Product Categories
Manufacturers Worldwide Delivery

Help - Buying from Select Solar
What prices are shown on the web site?
How do I make a purchase?
What payment methods do you accept?
How do I use a discount voucher?
Will I get an invoice?
I'm not in the UK. What currency will I be charged in?
What do you do with the information you hold about me?
What happens if things go wrong...?
What prices are shown on the web site?
-
Prices displayed are in pounds sterling (£) and include VAT at current UK rates.
-
We reserve the right to alter product prices on the website to reflect any increase in the cost of the products for reasons beyond our reasonable control, this may include (but is not limited to) pricing mistakes, tax or other duty increases.
-
Whilst we make every effort to ensure that all prices on our website are accurate and up to date sometimes errors do occur and the prices stated are incorrect. The correct price should be taken as the one displayed in the basket at checkout. Please see our terms and conditions for more information.
How do I make a purchase?
-
Click on the "add to cart" button next to the product you wish to purchase, and it will be automatically added to your shopping cart.
-
When you have finished making your selection(s), press the shopping cart picture or the "Checkout" button in the top menu. Once you are in the shopping cart pages select the shipping zone required and click the "recalculate" button to obtain the final price, then click on the "Go to payments" button, and you will be asked for some delivery and payment details.
-
You will receive e-mail notifications when we receive your order, when your order has been accepted, and when we dispatch the goods.
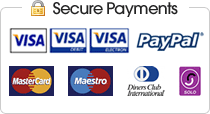
What payment methods do you accept?
-
We accept most major credit/debit cards, with the exception of American Express.

-
We accept payment through Paypal
-
We can accept cheques drawn in pounds sterling, but your goods will not be despatched until the cheque has cleared.
-
If you would like to open an account or pay by pro-forma invoice please contact us to discuss terms.
How do I use a discount voucher?
-
Add the item(s) to your basket
-
Once you have finished shopping view the basket and enter your discount code in the box marked “Got a discount code? Enter it here”
-
Hit “Add” to apply the discount to your order
-
Please note that you can only use one discount code per order and you are not able to use them in conjunction with any other offers.
-
If you are having trouble redeeming your promotional or unique discount code, please log into your account and send us an e-mail or call us straight away as these have expiry dates. We will not be able to refund you the discount amount if the code was not applied to your basket or an attempt made to contact us.
Will I get an invoice?
-
Yes. A VAT invoice will be included with your delivery.
-
VAT is included in the prices displayed.
-
If you don't want you to send an invoice with the goods please contact us when you make your order.
I'm not in the UK. What currency will I be charged in?
-
Prices on the web site are shown in Pounds sterling. If you are making a purchase from outside the UK using a credit card then your card provider will charge your card the equivalent amount in your local currency. The exchange rate is determined by your card provider.
-
If you are purchasing from within the EU you will be charged VAT at the current UK rate which is included in the price shown on the web site.
-
If you are purchasing from outside the EU you will not be charged VAT so your price will be lower than that displayed on the web site.
What do you do with the information you hold about me?
-
We are committed to protecting your privacy, and are registered with the Data Protection Commission. We will only use the information that we collect about you lawfully, in accordance with the UK Data Protection Act 1998.
-
We collect information about you for two reasons: to process your order and to provide you with the best possible service.
-
We will not e-mail you in the future, except regarding your current orders or queries, unless you have actively given us your consent by joining our e-mail list.
-
The type of information we hold includes: your name, address, phone number and email address
-
The information we hold will be accurate and up to date. You can check the information that we hold about you by emailing us. If you find any inaccuracies, we will delete or correct it promptly.
-
The personal information which we hold will be held securely in accordance with UK law.
What happens if things go wrong...?
-
Please check our delivery and returns pages.
-
To ensure that we provide you with the best possible service, we want to know when things go wrong. Please tell us of any complaints via our contacts page.
-
We will endeavour to respond to all complaints within two working days, and to keep you informed of progress.
-
You have the right to no-charge mediation by SafeBuy.
-
Please read our Terms & Conditions